Using Predeployed Multisig
| Instructions provided here are for general purposes only on how to use the predeployed multisig. You are highly encouraged to apply your own security evaluations, processes, and reviews to suit a multisig setup to your specific security needs. |
To use Gnosis MultiSigWallet for SKALE Chain owner administration, follow the instructions below, which are based on the tools and steps provided here: https://github.com/gnosis/MultiSigWallet.
| These instructions are for Gnosis' MultiSigWallet, which has been depreciated for Gnosis SAFE. See here for instructions using Gnosis SAFE. |
SKALE Chain Setup
| Before proceeding, be sure your SKALE Chain is deployed and you have access to an owner on the predeployed multisig and are funded with sFUEL. The SKALE Chain will have several predeployed contracts including Marionette and a predeployed Gnosis MultiSigWallet. These instructions detail how to interact with the predeployed multisig. |
-
Add your SKALE Chain endpoint to Metamask.
-
Setup a Gnosis MultiSigWallet local server or use a ready-made instance on IPFS using this link below:
-
Select your SKALE Chain endpoint in Metamask.
-
Click Unlock Metamask in the MultiSig UI.
-
Click Add button.
-
Click Restore deployed wallet to add the already deployed multisig.
-
Add the name and address of the multisig (
0xD244519000000000000000000000000000000000) and click OK.
From here,
-
You can now edit the required confirmations:

-
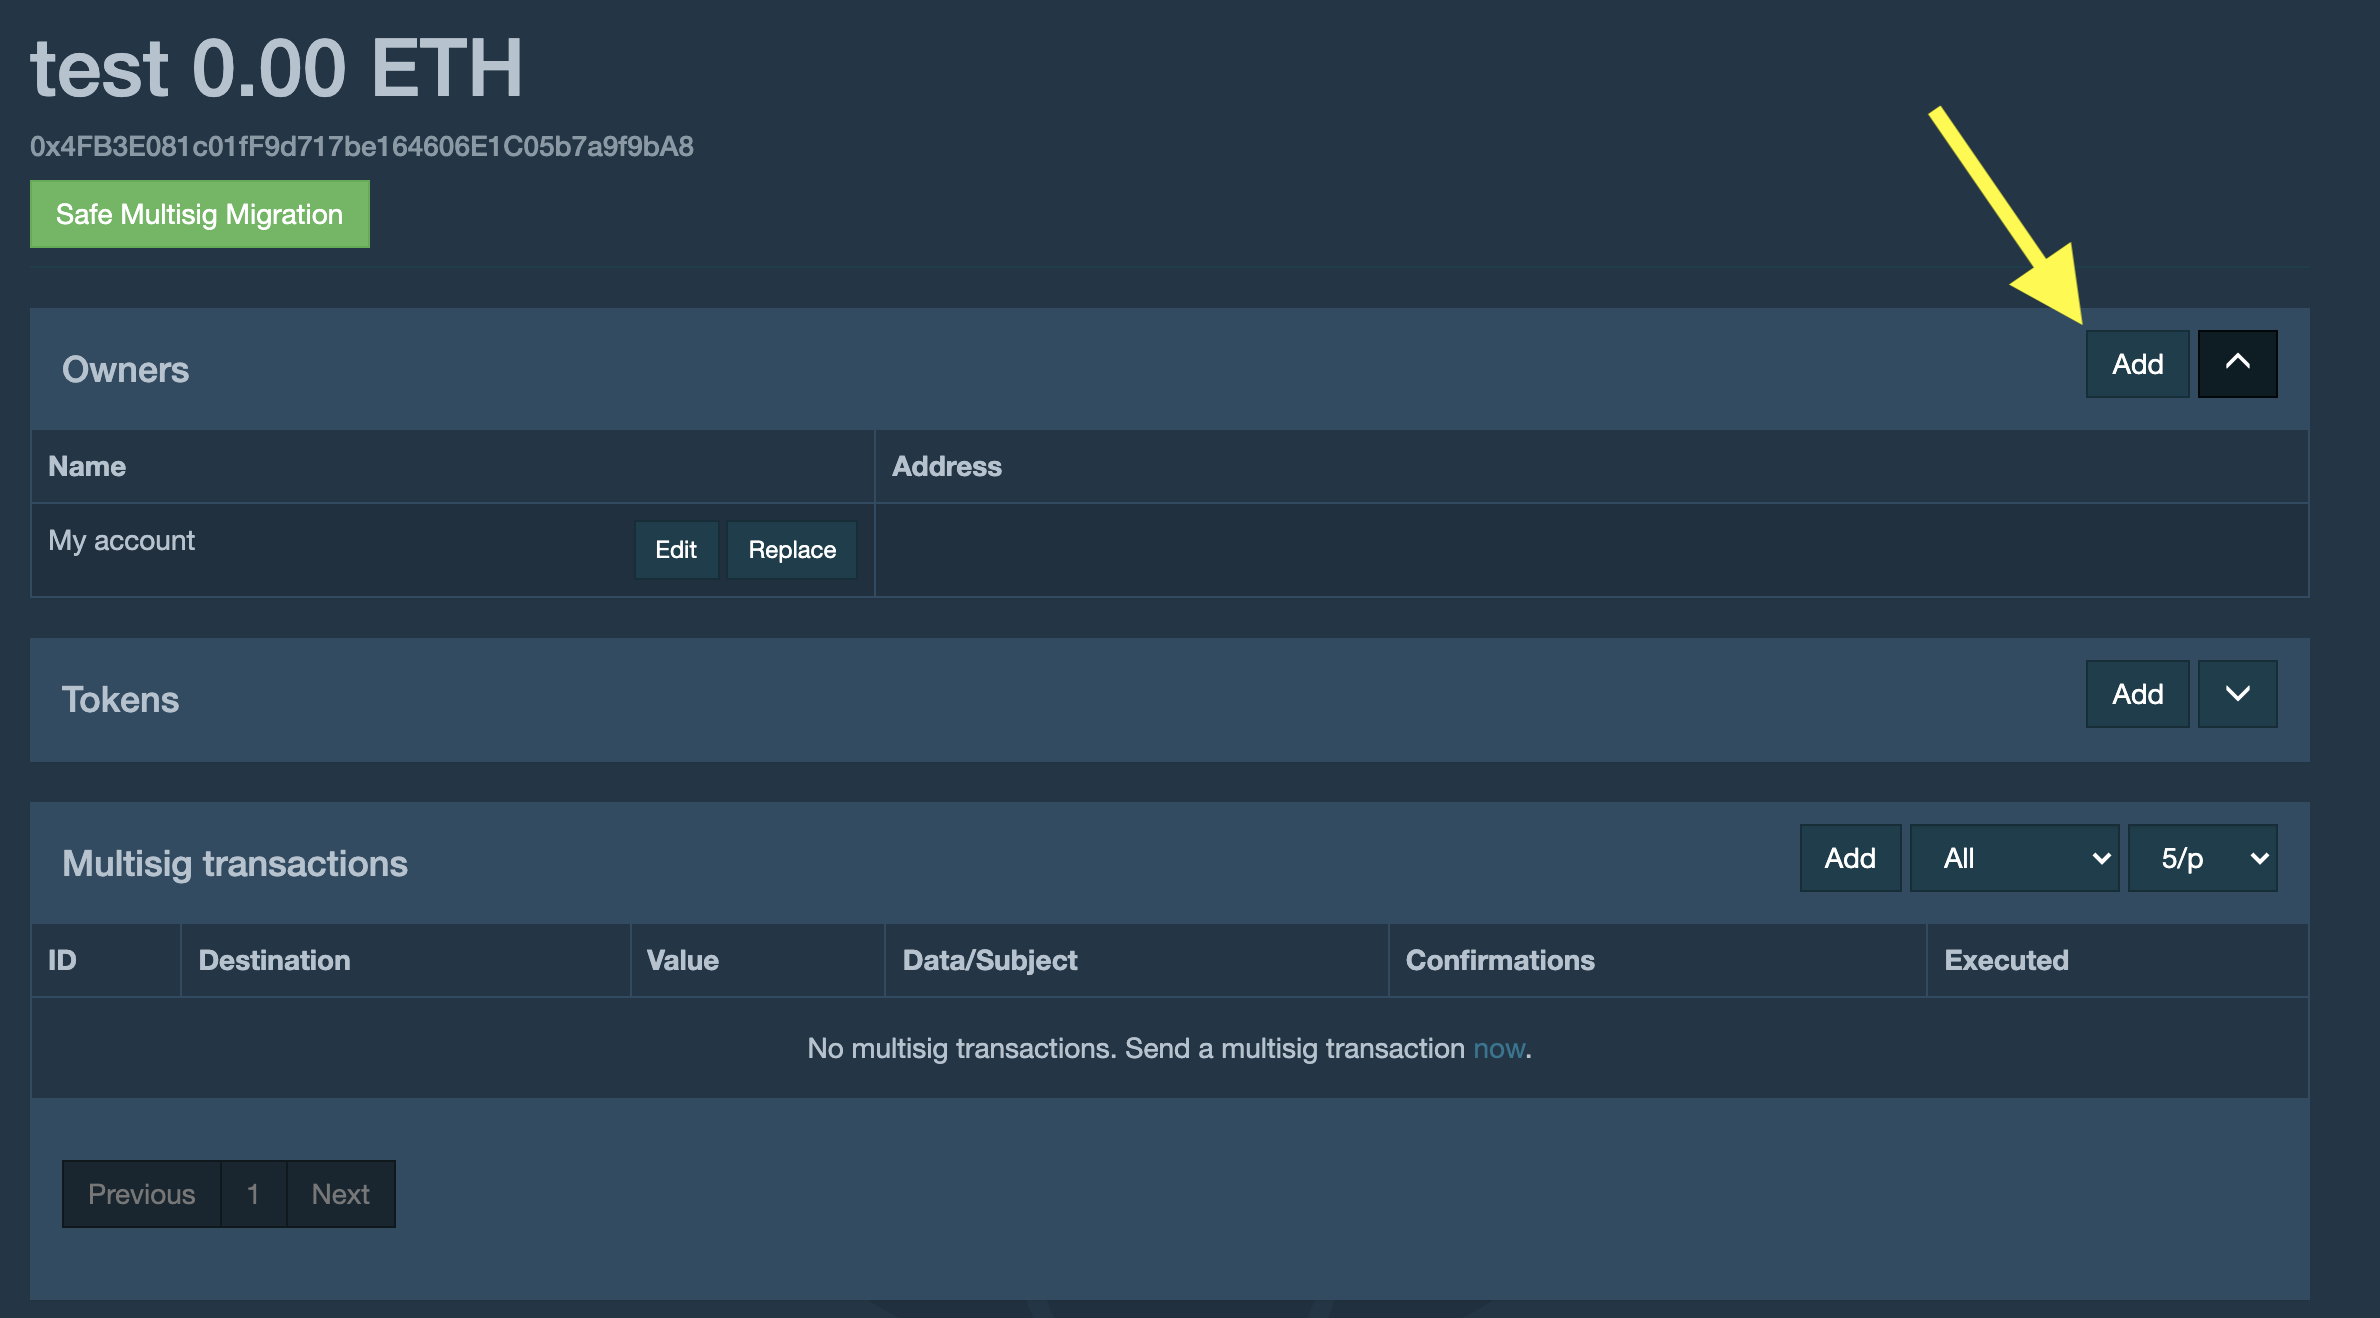
Add additional owners by clicking the multisig name,

And then add additional owners:
Sending Multisig Transaction
-
Click the name of your deployed multisig to view the multisig details.
-
Click Add in the "Multisig transactions" box. A modal will appear with further inputs.
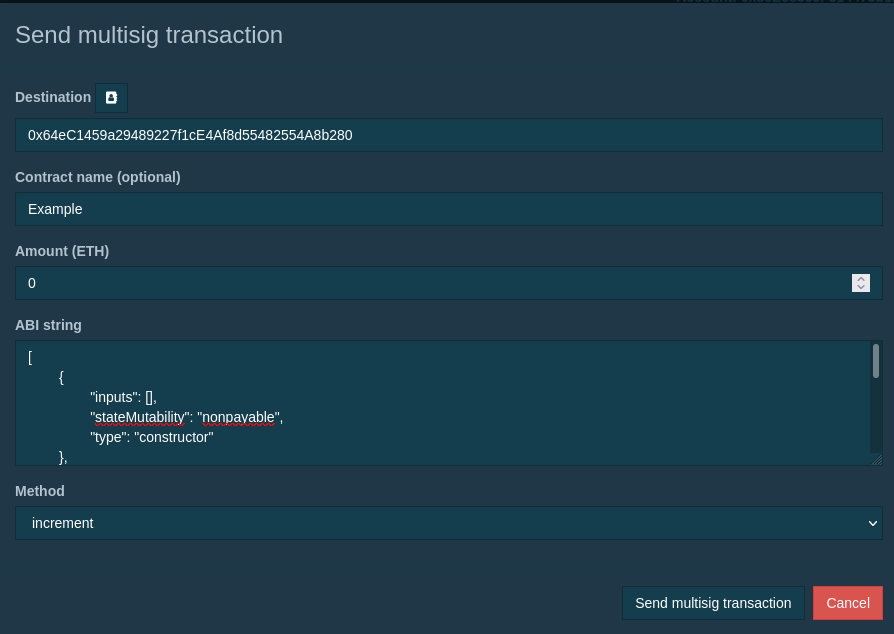
-
Enter the contract address, name (optional), and paste in the contract ABI. For example, if you want to permit another address to deploy contracts, first paste in the Marionette address
0xD2c0DeFACe000000000000000000000000000000and ABI: https://github.com/skalenetwork/marionette/releases/download/1.0.0-stable.0/marionette-1.0.0-stable.0-abi.json -
After a moment, the
Methodfield should populate with the available methods. -
Select the method
execute, and add additional fields. In this example, for target enter the config-deployer address0xD2002000000000000000000000000000000000d2, value:0, and for data, enter0xfollowed by the funcSig for addToWhitelist (e43252d7), followed by 24 zeros, and then the address to add. For example:0xe43252d700000000000000000000000033b5455b13148116189e8c50228b595dc062ab74 -
Click Send multisig transaction.
-
The multisig will then request the various owners to sign off on the transaction.
-
Send the deployed multisig address to each owner so they each can load the multisig.
Signing transactions
Each multisig signer should follow the instructions for signing transactions:
-
Add the SKALE Chain to Metamask.
-
Setup a local server or use a ready-made instance on IPFS using this link: https://github.com/gnosis/MultiSigWallet#an-instance-of-multisig-website-is-available-on-ipfs-at-httpsipfsinfuraioipfsqmfrd4guqzobni2nt2c77a3utq452ffwstr4fjejixugjf
-
Select the SKALE Chain endpoint in Metamask to which the multisig will be deployed.
-
Click Unlock Metamask in the MultiSig UI.
-
Click Add button to add a Multisig.
-
Click Restore deployed wallet to add an already deployed multisig.
-
Add the name and address of the multisig and click OK.
-
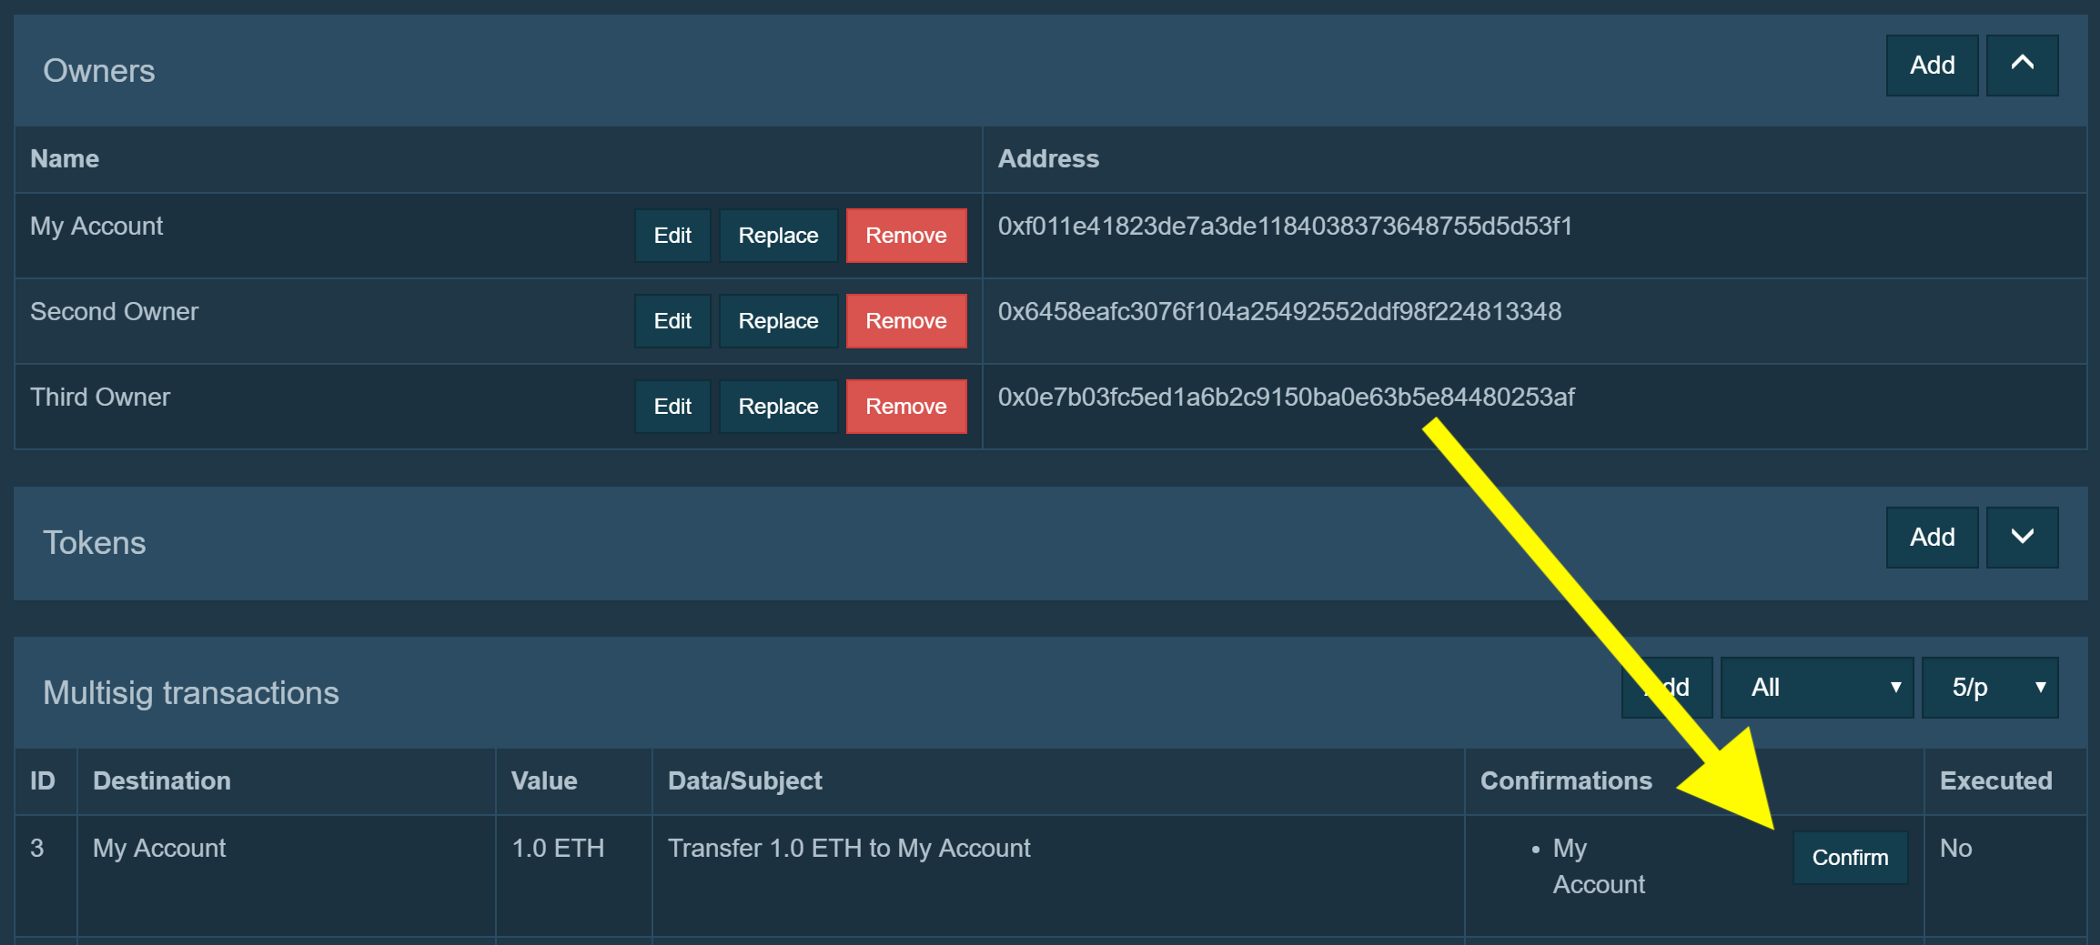
Click the multisig name and you should see the pending transaction.
-
Click Confirm to sign the transaction.
-
Wait until the other required signers signoff, and then the transaction will finally execute.